Posts

Showing posts from April, 2023

DIY Pressed Flower Bookmarks: How to Create Beautiful and Unique Bookmarks

Image
  Pressed flower bookmarks are a beautiful and unique way to mark your place in a book, and they make a thoughtful gift for any book lover. These bookmarks are easy to make and require only a few simple materials. In this step-by-step guide, we'll show you how to create your own pressed flower bookmarks, from selecting the right flowers to preserving them and arranging them on the bookmark. Whether you're an experienced crafter or a beginner looking for a fun new project, making your own pressed flower bookmarks is a great way to showcase your creativity and add a touch of natural beauty to your reading experience. What do you need? Pressed Flowers Glue Stick  Paper Bookmarks Laminating Machine Laminating Sheets (I used 3 mil pouches but 5 mil would be even sturdier) String, Ribbon or Tassel Pair of Tweezers Single Hole Punch Charms (optional) What do you have to do? Step 1: Gather Your Flowers For convenience I purchased all of my flowers. It’s much easier than pressing your o
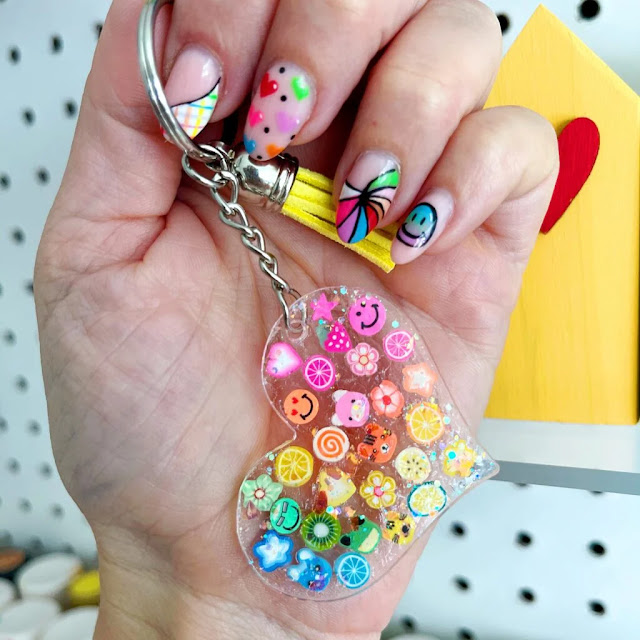
Create Your Own Personalized Keychains with Acrylic: A DIY Guide

Image
  Looking to add a little flair to your keyring? Creating your own acrylic keychains is a simple and rewarding DIY project that anyone can do. With just a few materials and a bit of creativity, you can make custom keychains that are both stylish and functional. In this tutorial, we'll guide you through the process of making DIY acrylic keychains step by step, so you can create your own unique designs and express your personal style in a fun and practical way. What do you need? Heart Clear Acrylic Keychain Blanks Set OR if you want Acrylic Letter Blanks check here (Note: If you use letter blanks you’ll need to get the key chain accessories separately.) Polymer Slices – polymer clay nail slices come in a variety of colors, themes and shapes. This is a great place to get polymer clay slices. ( Fruit slices, Mixed variety of clay slices, Valentine’s Day clay slices here and here, Christmas clay slices ) Charms – Add a resin charm. for an added design element. Glitter Paint Mod Podge Fo

Customizing Coffee Mugs with Vinyl and a Cricut

Image
  There's nothing quite like starting your day with a hot cup of coffee or tea, and what better way to enjoy your favorite beverage than with a personalized DIY coffee mug? With just a few simple supplies, you can create a unique and customized mug that's perfect for yourself or as a gift for someone special. In this article, we'll show you how to make your own DIY coffee mug, step-by-step. From selecting the right mug and design to applying vinyl and sealing it, you'll have all the information you need to create a beautiful and functional piece of personalized drinkware. So let's get started! What do you need? A mug of your choice Cricut Explore Cricut Accessories- Scraping tool,adhesive mat Oracal 651 Vinyl Measuring tape Transfer Tape A pair of scissors What do you have to do? Step 1: Create Design Log Into Design Space Upload and Customize Your Design. It is a good idea to play around with fonts and try to create your own design. For instance, I used the Curve B

Make Your Own Custom Canvas Tote Bags with a Cricut Machine

Image
  If you're looking to take your DIY tote bag to the next level, adding some personalized touches with a Cricut machine can help you create a unique and stylish accessory. With a Cricut machine, you can easily cut out custom designs, text, or patterns to add to your tote bag, making it truly one-of-a-kind. In this step-by-step guide, we'll show you how to make your own DIY tote bag with a Cricut machine, from selecting the right fabric and design to cutting and attaching your personalized elements. What do you need?   Cricut Explore Air 2 Cricut EasyPress Mat Ruler Cricut EasyPress 2 Tote Bags in the Boys’ Preferred Colors Cricut Everyday Iron-On Vinyl in White Weeding Tool Cricut Cutting Mat Design for Bag (You can see my design in Cricut Design Space here .) What do you have to do? Step 1: Create your design In search of a glove design, I perused the library and finally settled on a pair that caught my eye. Next, I took measurements of the gloves and resized them to my desire