DIY Personalized Wood Burned Spoon: A Meaningful Mother's Day Gift
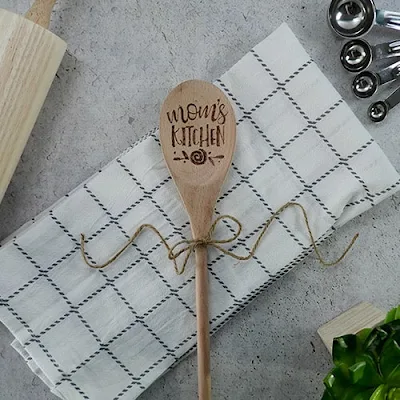
If you want to give your mom a truly special and personalized gift this Mother's Day, consider making a DIY Personalized Wood Burned Spoon with a DIY machine. Not only is it a thoughtful and practical gift, but it's also a fun and easy project that you can do at home. With just a few supplies and some creativity, you can create a one-of-a-kind gift that your mom will cherish for years to come. In this article, we'll guide you through the steps to create a beautiful wood burned spoon that is customized just for your mom. Let's dive in and get started!
What do you need?
Wooden Spoons
Vinyl (Color Doesn’t Matter)
Wood Burning Tool
Transfer Tape
Weeding Tool
Electronic cutter (cricut explore, silhouette or other cutter)
Cut File
What do you have to do?
Start by measuring the width and height of the head of the spoon. In your software program, draw an oval that is that same size. Then, place the design inside the oval and fit to size. For example, the spoon I used measured about 2.25″ x 3″. So, instead of putting a rectangle around my design like I normally do for stencils, I put an oval around it that measured 2.25″ x 3″. After everything is sized correctly, cut out the vinyl stencil and weed away the excess vinyl.
Cut a piece of transfer tape a little bigger than the design and place over the vinyl. Rub over the design to help it stick to the transfer tape.
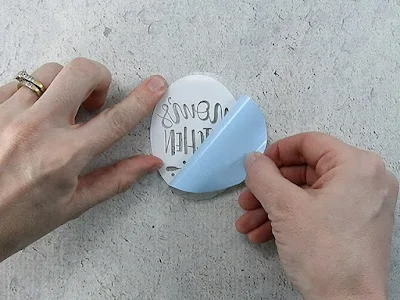
Then, flip over the vinyl and carefully peel off the vinyl backing.
Center the design over the head of the spoon and press down.
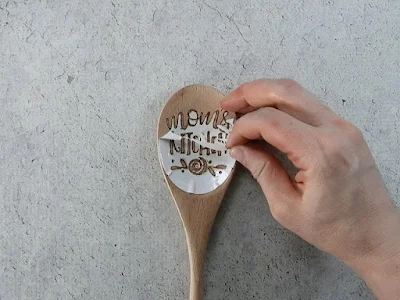
Since it’s a curved surface, the vinyl won’t lay flat. You’ll probably have a few creases, but that’s ok. Once you’ve got the vinyl in place, remove the transfer tape.
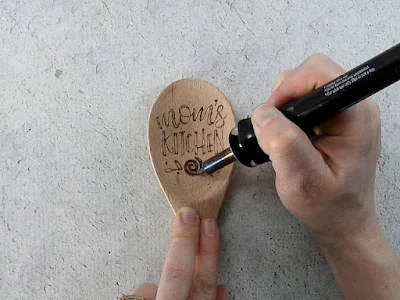
Now it’s time to get your wood burning tool ready. There are several tips in the package. I used the round tip with a round pointed end for this project, but you can try them all to decide which tip works best for you. Also, don’t touch the tool right by the tip. Your hand goes about halfway up the tool, so it takes a bit of time to get used to it. It can also get hot, so be careful. Plug in your wood burning tool and get it hot. Then start tracing around the design.
I used the tool and traced around the outside of the letters.
Once you’ve traced around the design you can remove the vinyl stencil.
Then, start filling in the design.
Touch up any spots that need fixing. That’s all there is to it. Your personalized wood spoon is done!
If you found the information in this post helpful and valuable, we would greatly appreciate it if you could share it with your friends and family. The more people who have access to these DIY gift ideas and tutorials, the more joy can be spread on special occasions like Mother's Day. Thank you for your support and for considering sharing this post!
Start by measuring the width and height of the head of the spoon. In your software program, draw an oval that is that same size. Then, place the design inside the oval and fit to size. For example, the spoon I used measured about 2.25″ x 3″. So, instead of putting a rectangle around my design like I normally do for stencils, I put an oval around it that measured 2.25″ x 3″. After everything is sized correctly, cut out the vinyl stencil and weed away the excess vinyl.
Cut a piece of transfer tape a little bigger than the design and place over the vinyl. Rub over the design to help it stick to the transfer tape.
Then, flip over the vinyl and carefully peel off the vinyl backing.
Center the design over the head of the spoon and press down.
Since it’s a curved surface, the vinyl won’t lay flat. You’ll probably have a few creases, but that’s ok. Once you’ve got the vinyl in place, remove the transfer tape.
Now it’s time to get your wood burning tool ready. There are several tips in the package. I used the round tip with a round pointed end for this project, but you can try them all to decide which tip works best for you. Also, don’t touch the tool right by the tip. Your hand goes about halfway up the tool, so it takes a bit of time to get used to it. It can also get hot, so be careful. Plug in your wood burning tool and get it hot. Then start tracing around the design.
I used the tool and traced around the outside of the letters.
Once you’ve traced around the design you can remove the vinyl stencil.
Then, start filling in the design.
Touch up any spots that need fixing. That’s all there is to it. Your personalized wood spoon is done!


Comments
Post a Comment