Elevate Your Drinking Experience with a DIY Kentucky Bourbon Etched Glass Set
Bourbon lovers rejoice! If you're looking for a creative and unique way to serve your favorite bourbon, look no further than this DIY Kentucky Bourbon Etched Glass Set. By following a few simple steps, you can create a beautiful and personalized set of glasses that will impress your guests and make your bourbon taste even better. Etching your glasses not only adds a touch of sophistication, but it also makes it easier to identify which glass is yours in a crowded bar or at a party. So, grab your favorite bottle of bourbon and let's get started on this fun and easy DIY project!
What do you need?
Drinking glasses
Etching cream
Vinyl stencils created with Silhouette Cameo
Transfer paper & painter’s tape
Plastic knife
Isopropyl alcohol & paper towel
Disposable gloves
Timer
What do you have to do?
Step 1: Designing stencils
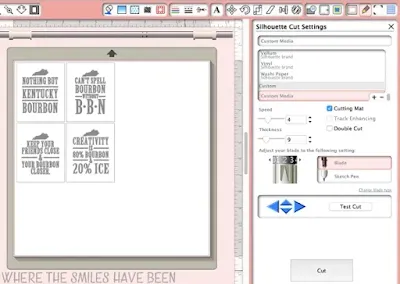
Step 2: Vinyl cut settings in Silhouette studio
I used the default Vinyl cut settings but bumped the speed way down to a 4 since these cuts were pretty small and intricate:
Speed: 4
Thickness: 9
Blade: 2
Cutting Mat: Checked
{Note: Even though all four designs are shown here, I turned the cut lines off for the “Keep Your Friends Close” stencil since I had already etched that glass. I just left the design on the page to help with sizing the other three.}
Step 3: Cutting Out Stencils On Silhouette Cameo
Now that my designs were ready, it was time to cut them out. I’ve always had success with using vinyl stencils, whether it be on canvas, wood, or a tote bag, and since it worked well for my Dad’s glass, I decided to use more for this project. If it ain’t broke….
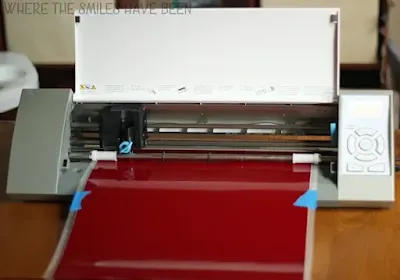
I flipped through my vinyl storage organizer until I found a color that I had a surplus of and that I don’t have any plans for using in the near future: a burgundy red sheet. So I loaded it up on my cutting mat, applied a couple strips of painter’s tape to the sides just to keep it nice and secure (my mat is very well-loved and therefore not very sticky anymore), then loaded it into my Silhouette Cameo.
Step 4: Apply Vinyl Stencils
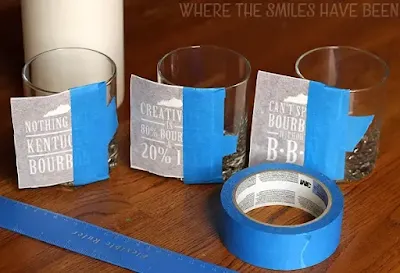
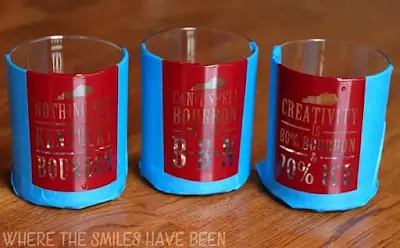
Once the stencils were cut, I trimmed them up, weeded (or removed) the excess vinyl, and slapped some transfer paper overtop. Then I put on my gloves, cleaned the glasses off with some isopropyl alcohol, and using the hinge method, I applied each stencil to a glass.
Once the vinyl was applied, I then went and added a border of painter’s tape around all the edges, just as a little safety net of sorts. I’m a pretty messy DIYer and need all the safety precautions I can get to help save me from myself.
Step 5: Adding etching cream
It was finally time to get my etch on! Basically, make sure you’re wearing gloves and eye protection because this stuff has some pretty intense chemistry going on (I mean, it’s permanently scarring glass, so it oughta!), and watch out for powder that *poofs* out when you first take off the lid….it gets me every time!
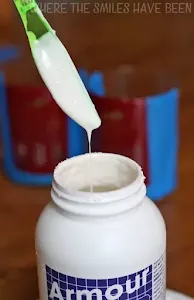
I set the timer on my iPhone for five minutes and then grabbed a super cool, neon green plastic knife (a remnant from my son’s first birthday party) and started smearing the etching cream onto the first glass. Once the first glass was fully covered and finished with application (which took about 30 seconds), I moved onto the second and did the same, then finally onto the third.
Then, instead of just sitting and waiting around for the remainder of my five minutes to pass, I went back to the first glass and started moving the etching cream around some more with my knife. I’m not sure if it’s necessary (probably not), but I think it helps for a smoother and more even etching (I could be crazy though), and it also helps the time fly by (added bonus).
Step 6: Washing off etching cream & removing stencils
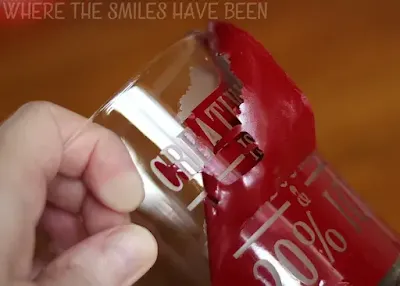
Once my timer buzzed, I scraped the excess etching cream back into the bottle, and then it was a mad dash to the sink! The etching cream washes off really quickly and easily, so once all three glasses were cleaned and dried, I started peeling away the painter’s tape and vinyl stencils….and held my breath to see if this was a successful project or a craft fail. Ahhh, the anticipation was almost too much to bear!
Luckily, it was a success! The vinyl stencils are the bee’s knees and provided crisp lines with NO bleeding of the etching cream. Wahoo! It took a few minutes to peel away all the little bits of vinyl off the three glasses, and once they were bare, all I needed was another rinse with some soap and water and this project was complete!
Step 7: The final DIY Kentucky Bourbon Etched Glass Set
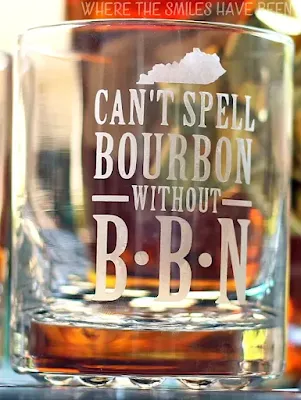
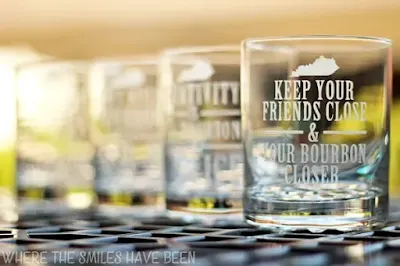
And here they are! A complete set of custom-made etched drinking glasses from which my husband can enjoy sipping his sweet Kentucky Bourbon.
I hope this tutorial on making a DIY Kentucky Bourbon Etched Glass Set has inspired you to unleash your creativity and try your hand at making other personalized products. With a few basic supplies and some creativity, you can create unique and personalized gifts that your loved ones will cherish. Don't be afraid to experiment and try new things - you never know what amazing creations you might come up with! Thank you for taking the time to read this article, and happy crafting!





Comments
Post a Comment