Craft Your Own Personalized Hello Front Door Sign with These DIY Tips
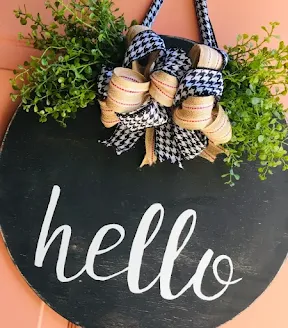
Crafting a DIY Hello Front Door Sign is an excellent way to infuse your home's entrance with a unique touch of personality and warmth. Fortunately, this project is both easy and enjoyable to complete, requiring only a few simple steps and materials. With a little bit of creativity and some DIY spirit, you can create a front door sign that is not only perfect for your taste and style, but also beautiful and welcoming to guests. From selecting the perfect wooden letters and paint colors to arranging them in an aesthetically pleasing way, every step of the process offers an opportunity to express your creativity and add your personal touch to your home's decor. So why not get started on your DIY Hello Front Door Sign today and experience the joy of creating something both functional and beautiful with your own two hands?
What do you need?
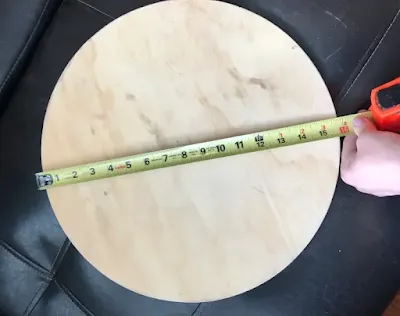
16″ wood circle
black and cream acrylic craft paint
foam brush
mini sander
drill
printable stencil and colored pencil
small angle paint brush
craft or floral ribbon (I used 3 yds of 2 different 1 1/4″ ribbons )
small bunch of greenery
hot glue gun and glue
What do you have to do?
First cut that 16″ wood circle.
Paint the circle black, let it dry, and sand it all over, sanding a little extra along the edges to give it a rustic look.
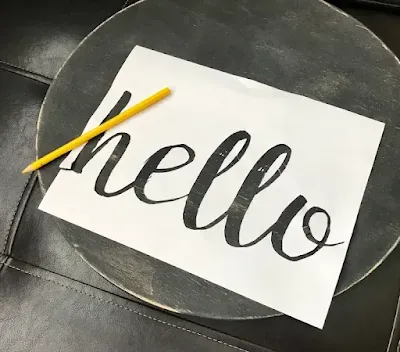
Now, you are ready to letter. Download and print the hello stencil. You will need to print it, then cut out the black printed letters to create a stencil.
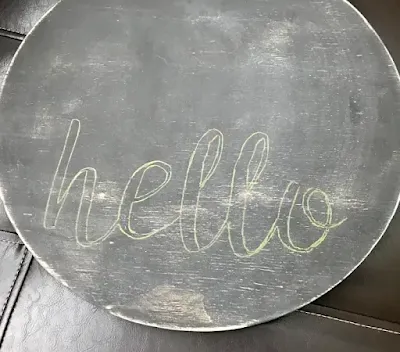
Get the stencil into position, centered in the lower half of the circle, and lightly draw on the hello with a colored pencil.
- Using the small angled brush and cream acrylic paint, paint in the letters. You will need to do at least 3 coats.
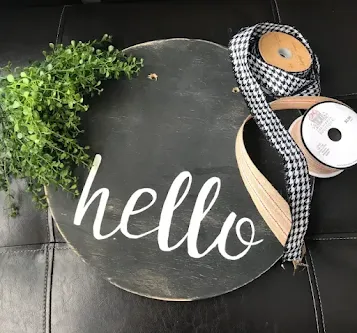
Once your painting is complete, drill 2 holes about 6″ apart in the upper part of the circle as shown. This will allow you to knot a ribbon through for hanging.
Attach your greenery, (I pulled mine apart into 2 bunches and wried them together before glueing.)
Make a loopy bow with your ribbon and glue into place on top of the greenery. (You can also make use of the drilled holes for attaching the bow or greenery. I threaded some twine through to help hold it in place.)
Go hang it on your door! And enjoy looking at it all season long!
I sincerely hope that the tips I shared on how to make your own DIY Hello Front Door Sign were helpful and insightful. Putting a personal touch on your front door is an excellent way to make your home feel warm and welcoming, and creating a customized sign is a great place to start. I believe that with a little bit of creativity and effort, anyone can craft a beautiful and unique front door sign that perfectly reflects their personality and style. Thank you for taking the time to read my suggestions, and I hope that you feel inspired to embark on your own DIY project. Happy crafting!






Comments
Post a Comment