Get Creative in the Garden with DIY Signs Made Using the Cricut Maker

Adding personalized garden signs is a great way to give your outdoor space a unique and charming touch. And with the help of the Cricut Maker, creating custom garden signs is easier than ever. In this guide, we'll show you how to make DIY garden signs with the Cricut Maker, so you can add some personality to your garden in no time!
What do you need?
Cricut Maker
Cricut knife blade (for use only in the Maker)
Purple strongest grip machine mat
1/16″ Basswood
3/4″x4″x12″ wood for signs
Screw eye hooks (2 per sign)
18″ Plant Hanger/Extender
2″x2″ Garden Stake
Wood glue (that dries clear)
Paint or stain of choice
Varnish/sealant
Cut File
What do you have to do?
Step 1: Design The Sign Lettering
Starting on the Cricut design space, I’m using the simple Cricut Sans font and a vine flourish to create my garden signs. Be careful not to use a font that has a lot of detail work or thin areas that will break easily after being cut. You’ll also have to smoosh the letters together so it will work as one continuous cutout. Overlap any added images, and when you are done, select all the elements and combine them using the weld button.
Step 2: Preparing The Basswood Cutouts
- Be prepared for the machine to take longer than normal to cut out your lettering onto basswood. Each of these signs took almost an hour for the machine to do it’s thing, but it was incredibly precise! I worked on the rest of the garden sign while the Cricut cut, and checked on it from time-to-time.

There will be instruction prompts to use the strongest grip mat, tape the basswood onto the mat, and move all three roller pads to the far right before starting. Here it is! My very first project cutout on the Cricut, and it turned out pretty amazing!

Carefully remove the lettering by bending back the mat and gently pushing the letters through. If any pieces break, that’s okay. Save any little bits, and you’ll glue them in place later. I am using both the letters and the cutout for a front and back to my sign, so I’m saving every single piece. Paint or stain the letters, cutout, and inside letter pieces.

While that dries, and your Cricut cuts another sign lettering, you can start on your sign backing.
Step 3: Creating The Signs
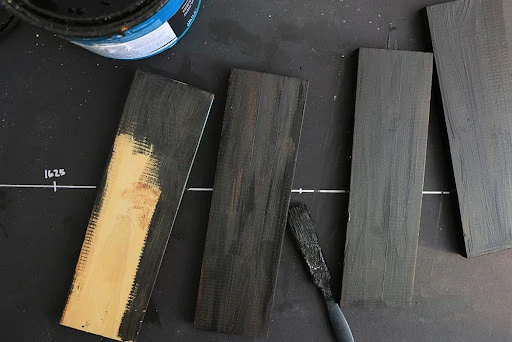
I’m using 3/4″x4″ pressure treated scraps from another project, and cutting them into 12″ lengths. But you can make it whatever size works best for your lettering. Paint or stain your wood pieces and leave them to dry.
- Once everything is dry, I am using the wooden sign over top the basswood to score and cut it to the same width.

Use wood glue that dries clear, and adhere the lettering/cutout onto the wooden sign. Be sure to glue all the little flourishes really well. Then place the sign on top of another piece of wood and gently clamp it down so it all dries flat without the basswood curling up.

Once the glue is dried, do the back of the sign so it will be double sided. One side will be lettering, the other side will be a cutout, but both sides will be gorgeous! Pour hard drying triple layer varnish inside the lettering pieces and seal the entire sign really well. You can also use clear drying ModPodge to seal the insides of the letters. Sealing it and protecting the basswood from the outdoor elements is important.
Screw on your eye hooks, and they are ready to go on your garden post/sign holder!

Step 4: Making The Sign Holders
- To make the garden posts/sign holders, cut 2″x2″ wooden stakes, or make your own stakes by cutting an angled base. Attach plant extender hooks to the wooden stake using rubber lined clamps. Spray paint everything to match, and presto! You’ve got a garden sign holder!

- You could also use a yard sale sign, or buy sign holders like this online, but this is a much cheaper and sturdier solution! Once you hammer those bad boys into the ground, you’ll hang your newly made garden signs.

There is a bit of a trick to attaching the signs, you’ll need to be able to rotate the eye hook as you pivote the sign, sliding it onto the extender hook.

I hope that my insights on how I typically create DIY garden signs will serve as a useful guide for you to create your own standout garden signs. If you found this post informative and useful, please do not hesitate to share it with your friends and loved ones. Your support means a lot, and it is my pleasure to be able to inspire and guide you on your crafting journey.


.png)
.png)
.png)
.png)
.png)
.png)
.png)
.png)
.png)
.png)
Comments
Post a Comment